Setting up HunchBuzz with Azure AD OpenId
NOTE: You can only self-provision Azure AD authentication for a new community, i.e. you cannot add Azure AD authentication to an existing community yourself. If you have an existing community that requires Azure AD please contact us.
Step 1
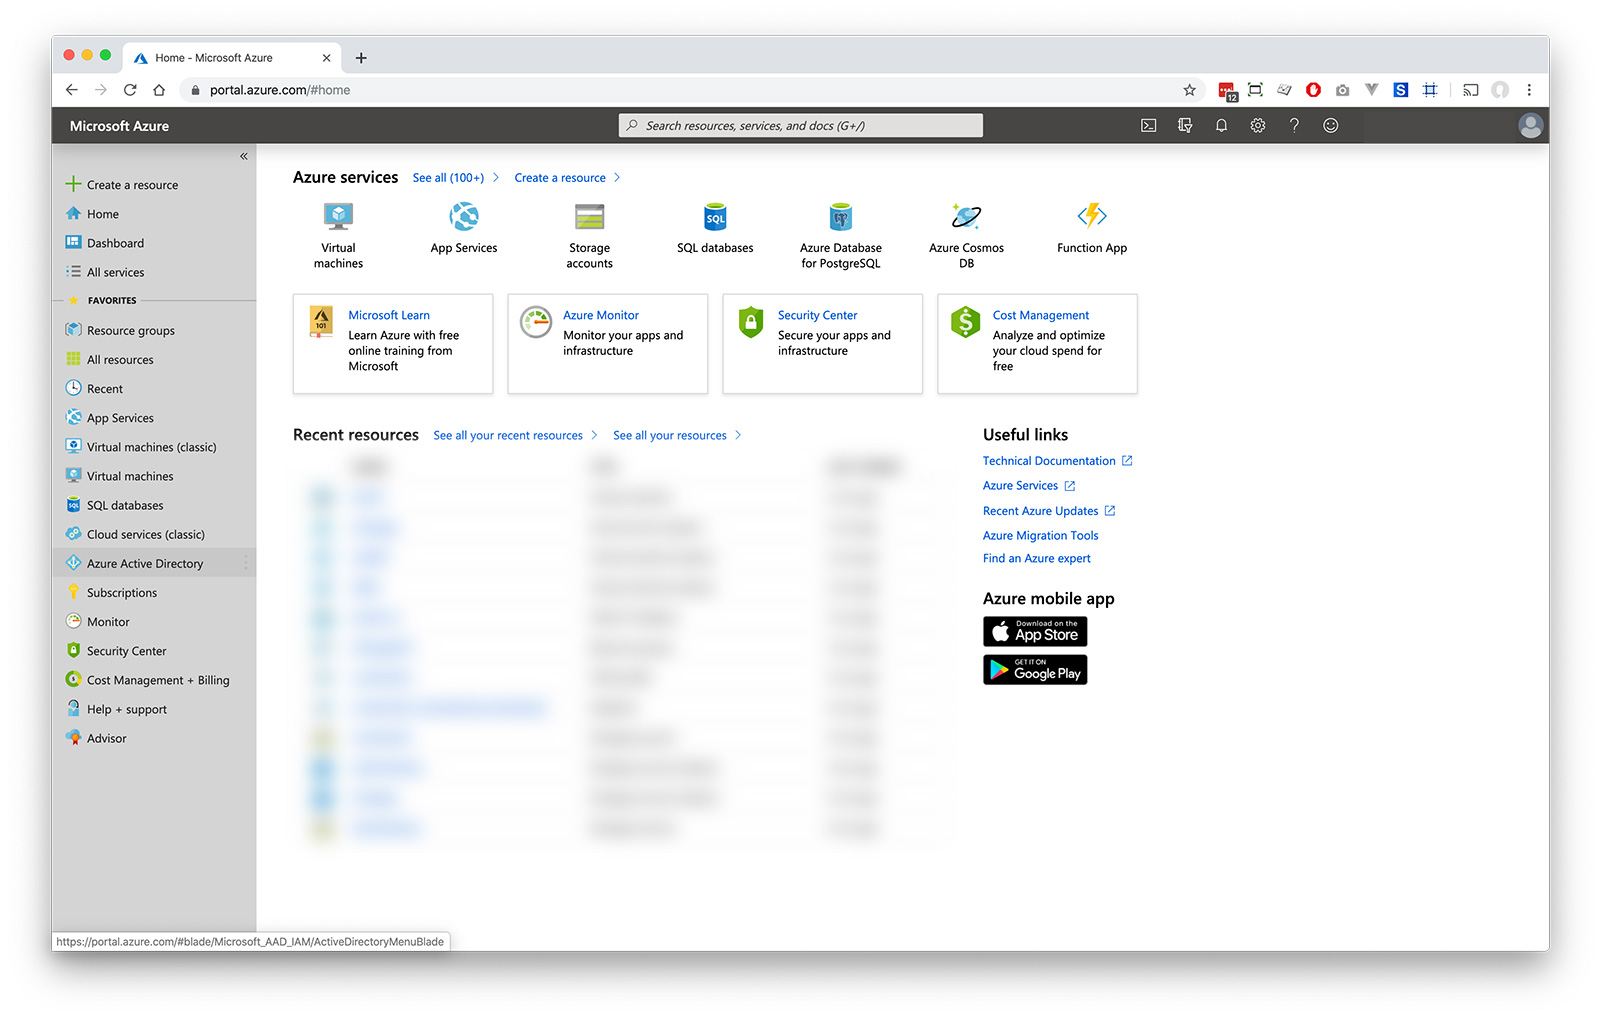
Make sure you are signed into the Azure Portal
Step 2 - Azure setup
-
Choose 'Azure Active Directory' from the sidebar
-
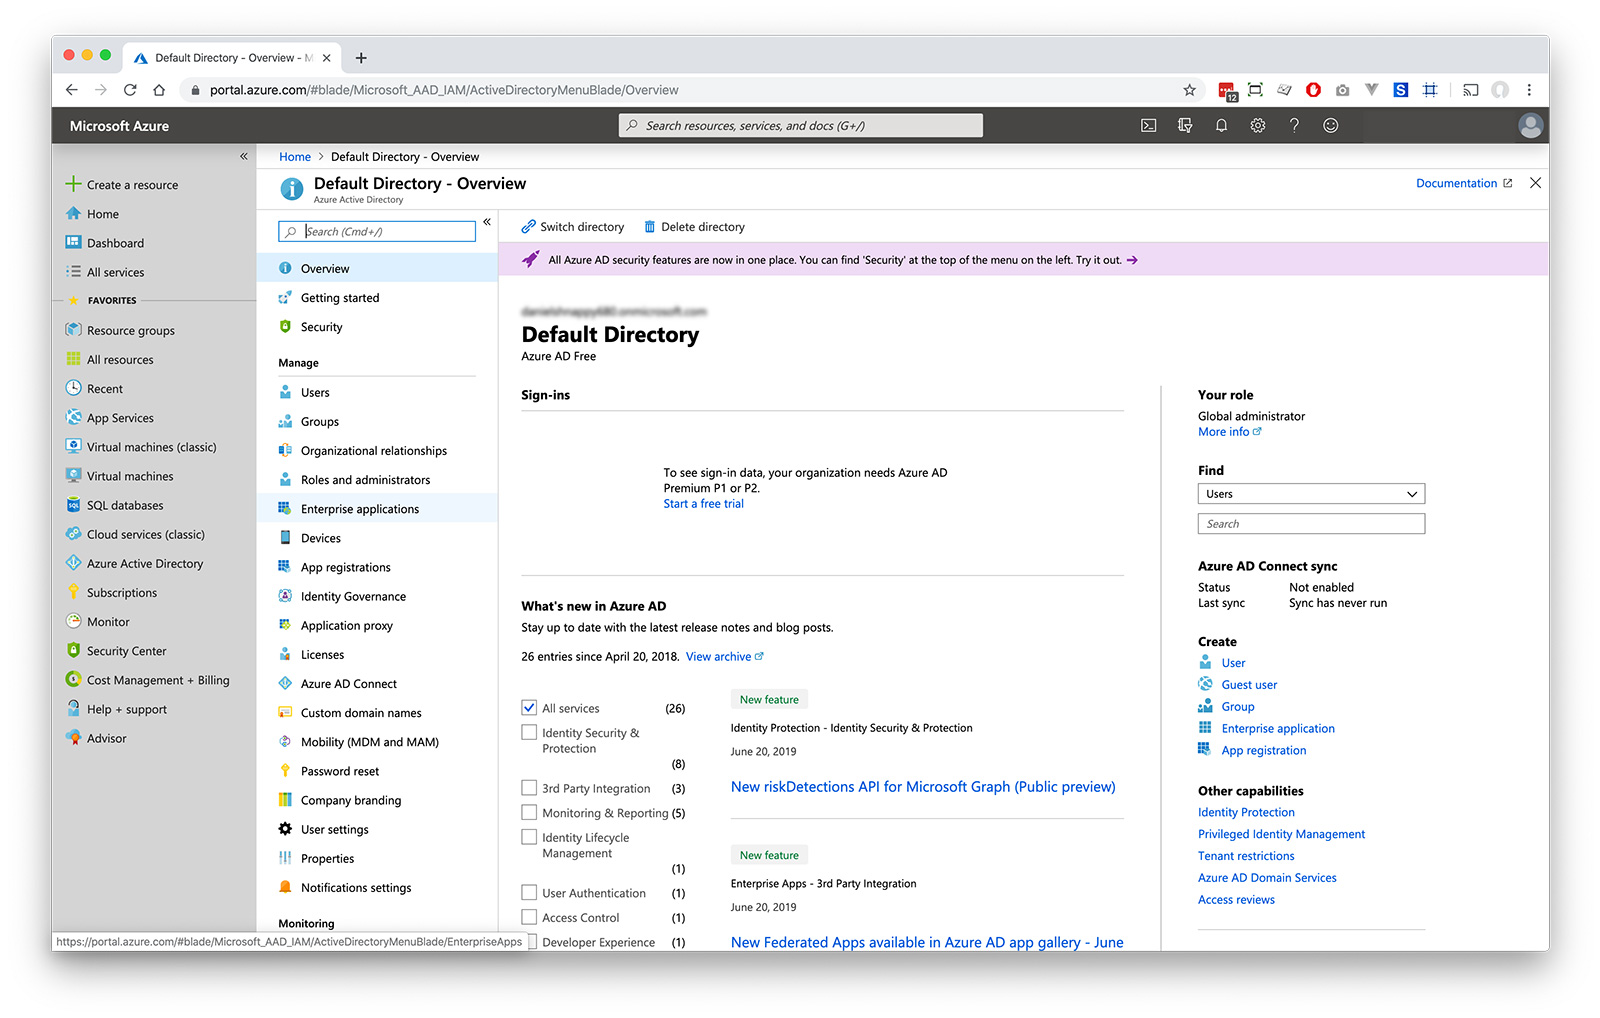
Choose 'Enterprise Applications' from the directory options
-
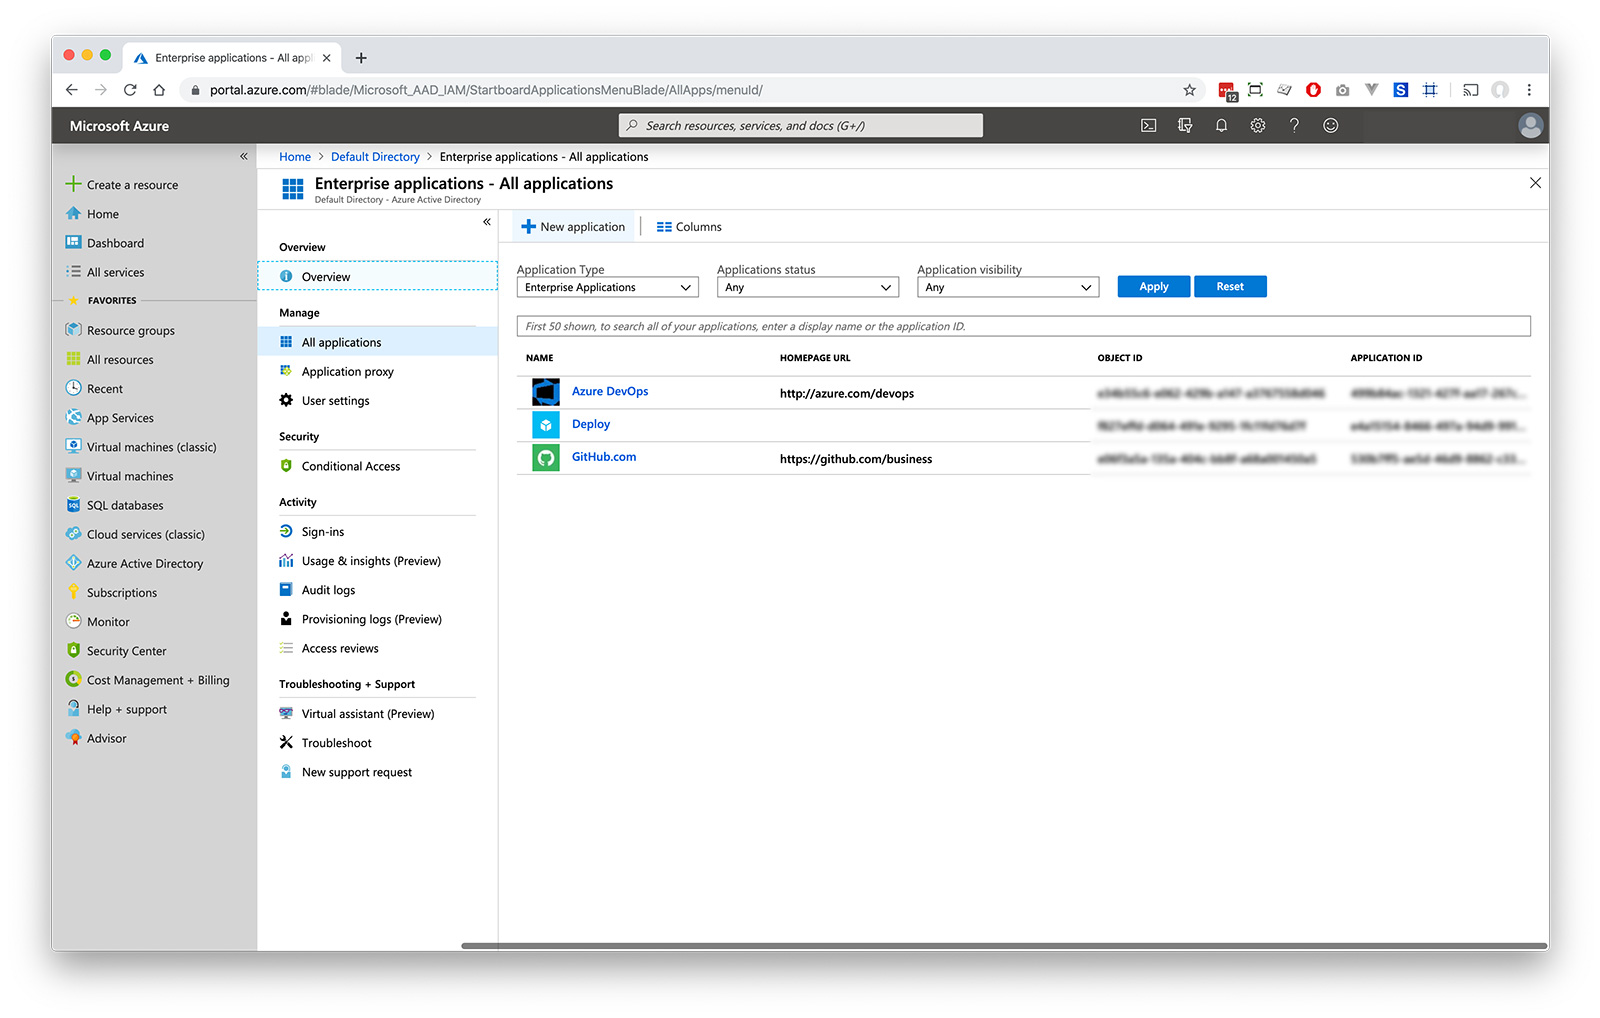
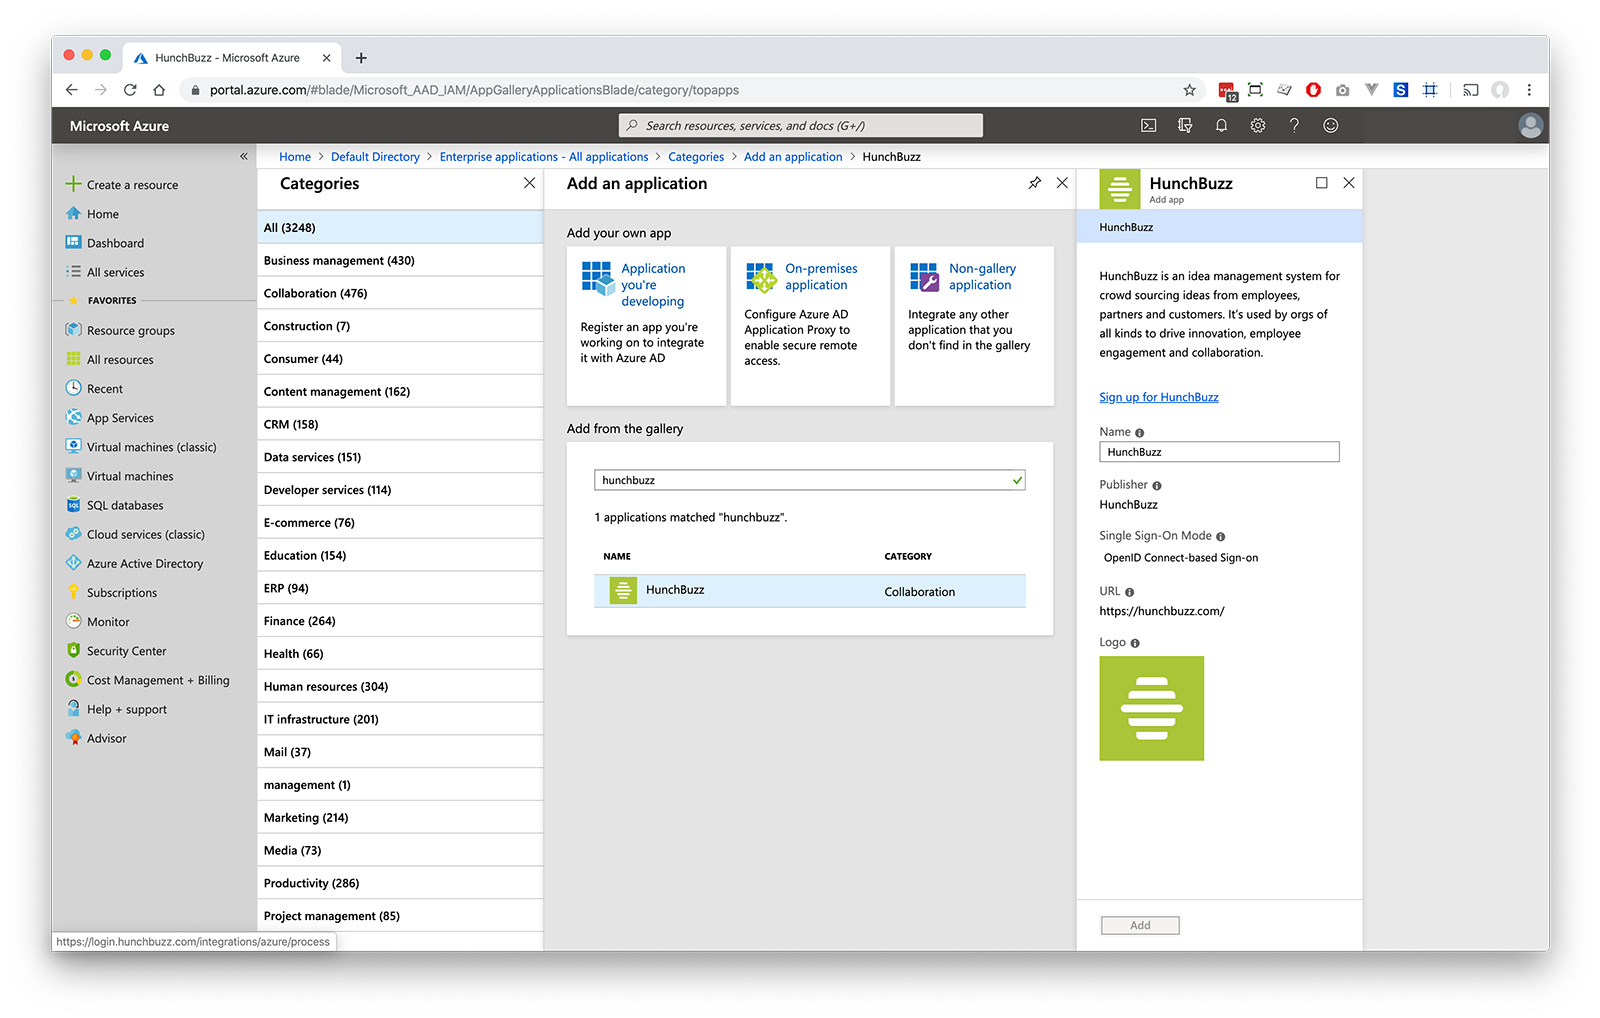
Click 'New Application'
-
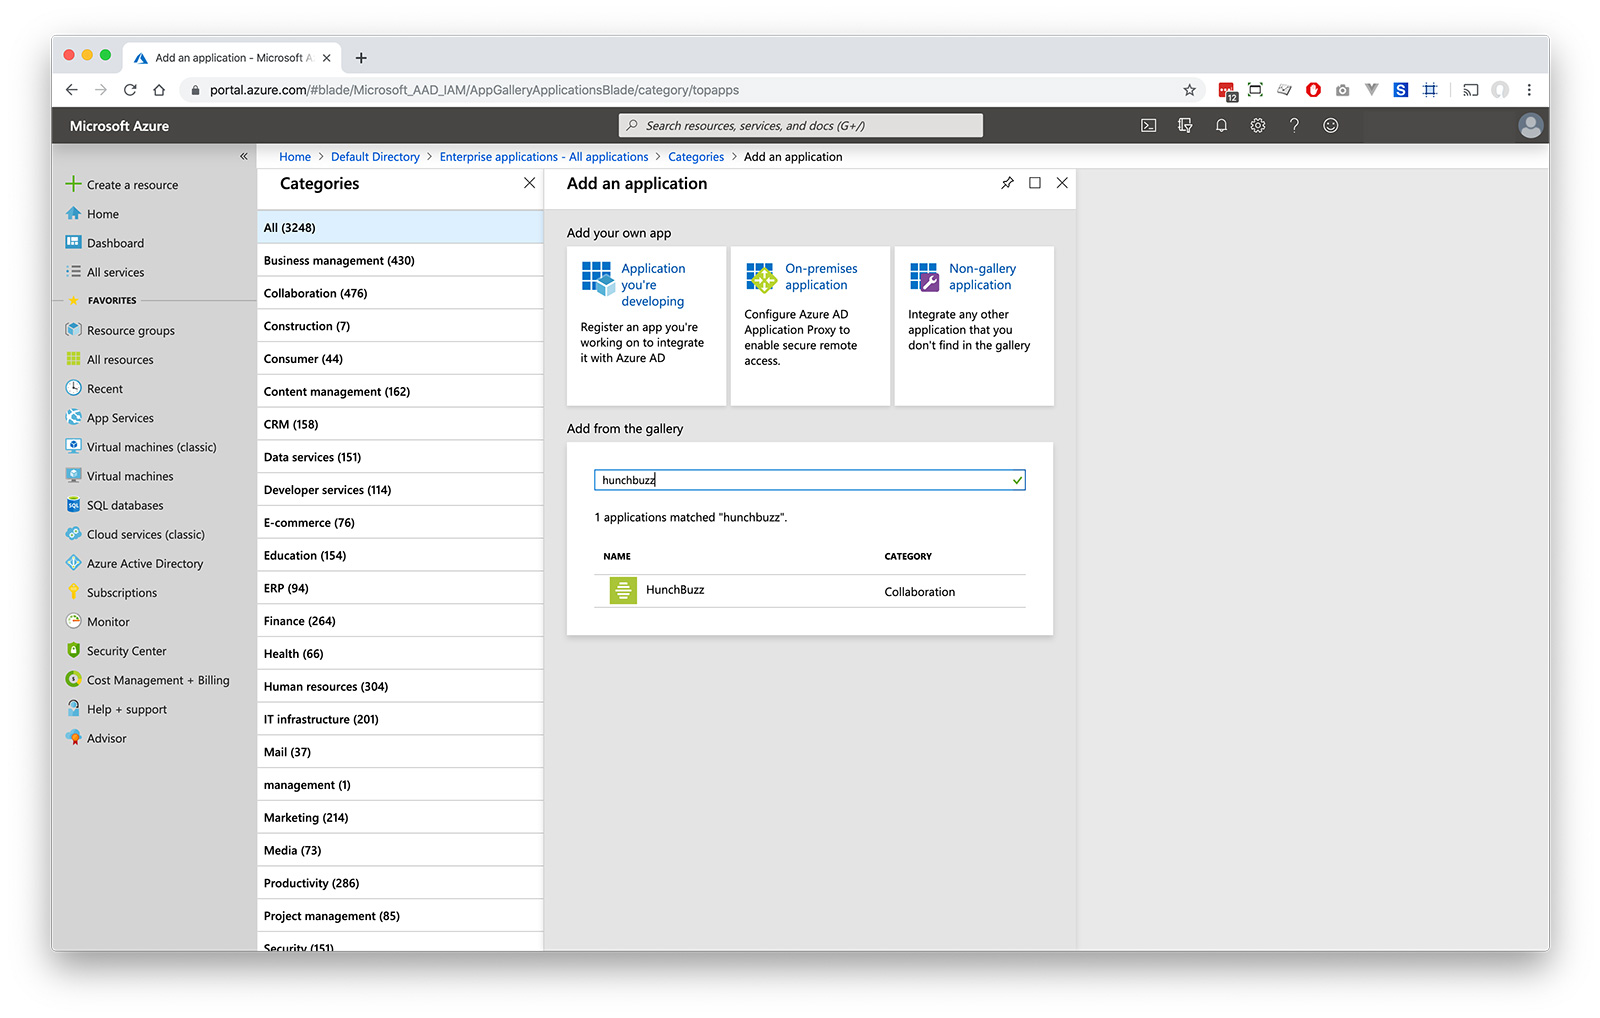
Search 'HunchBuzz' and click it
-
Click 'Sign up for HunchBuzz'
-
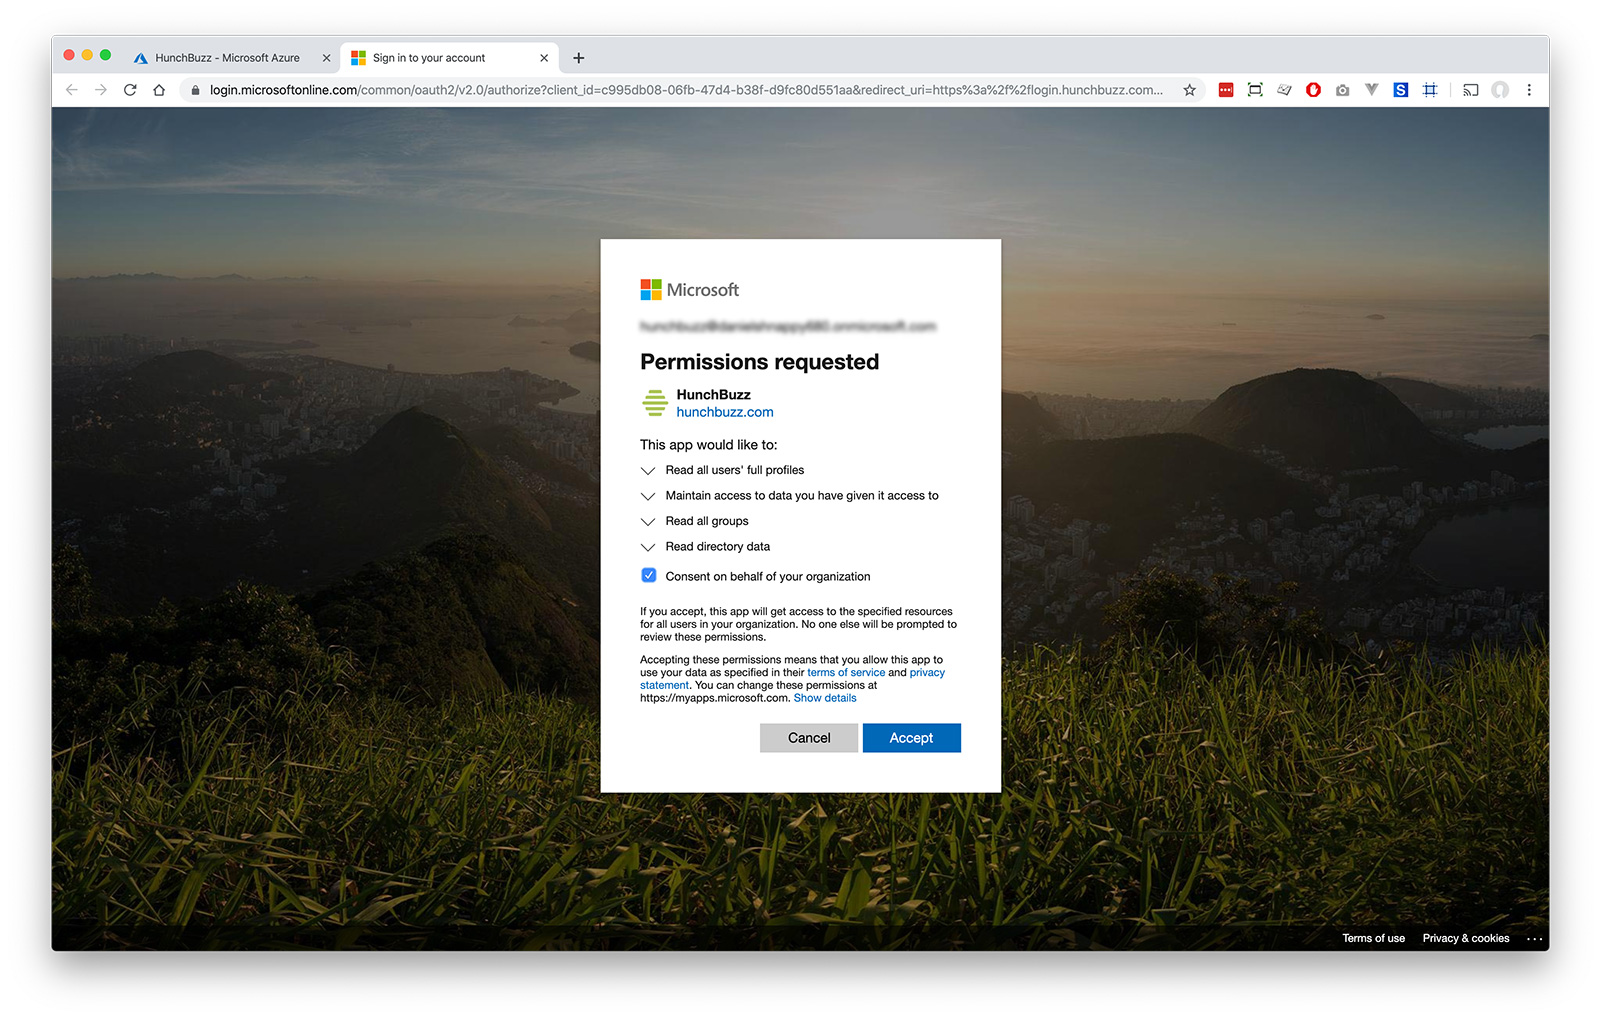
Grant HunchBuzz the permissions we require
-
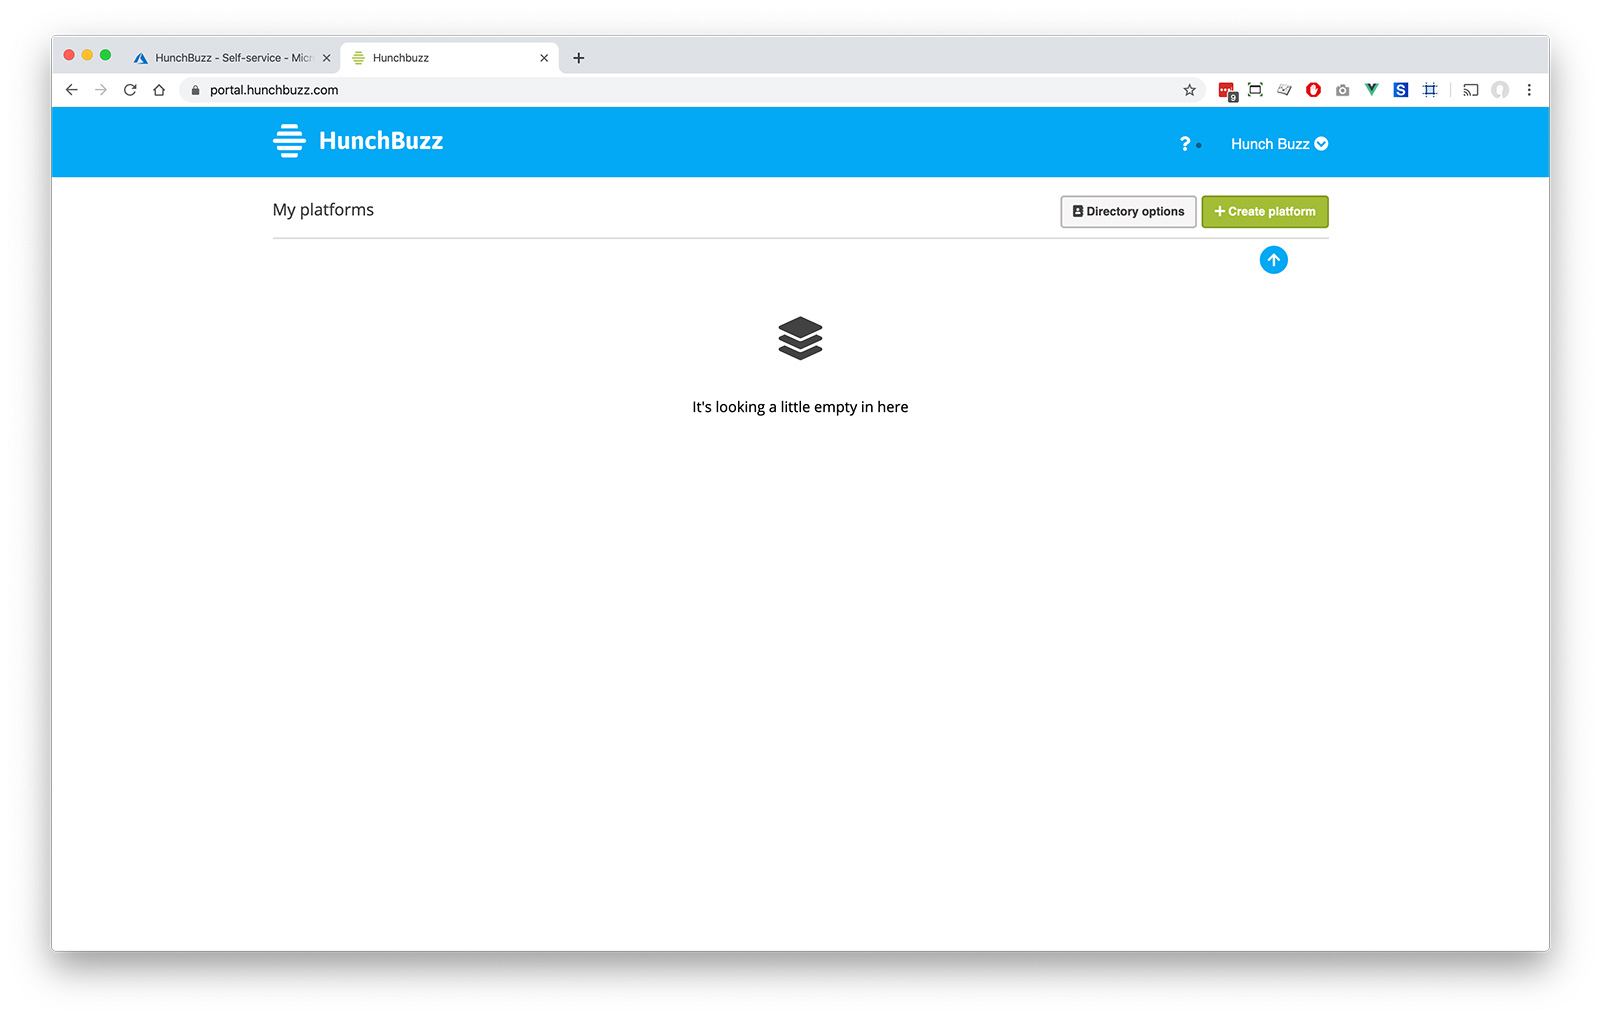
You will then be signed into HunchBuzz
-
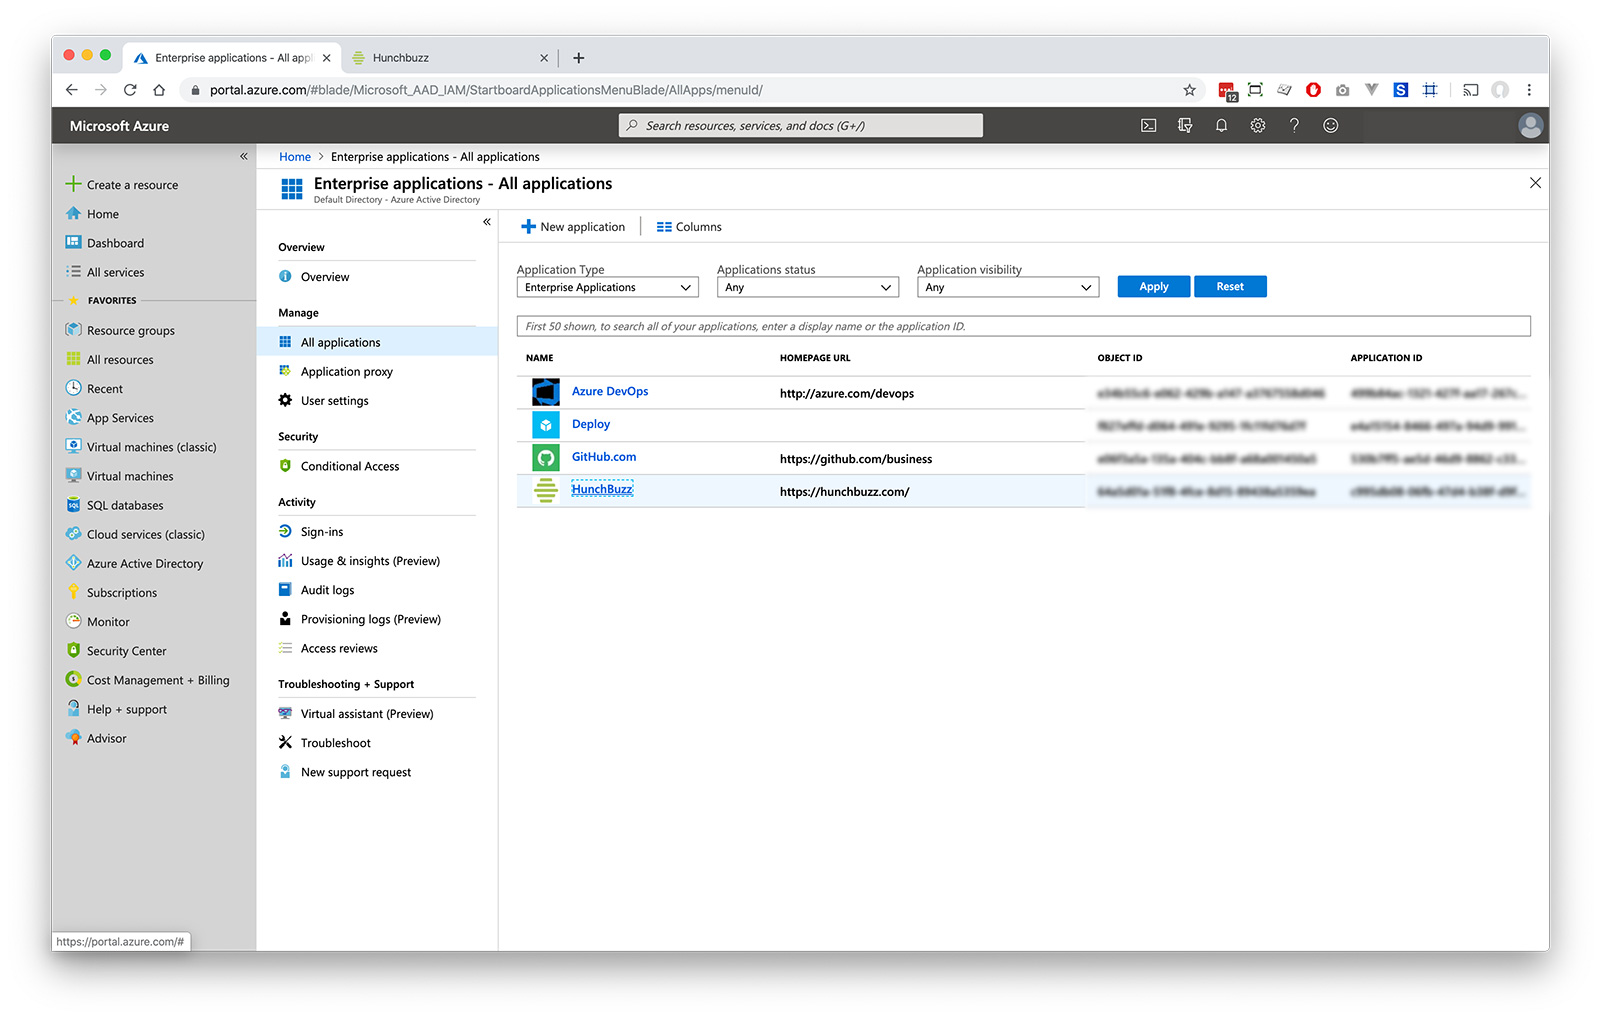
Back in your 'Enterprise Applications', find HunchBuzz and click on it
-
Click the 'Self Service' box
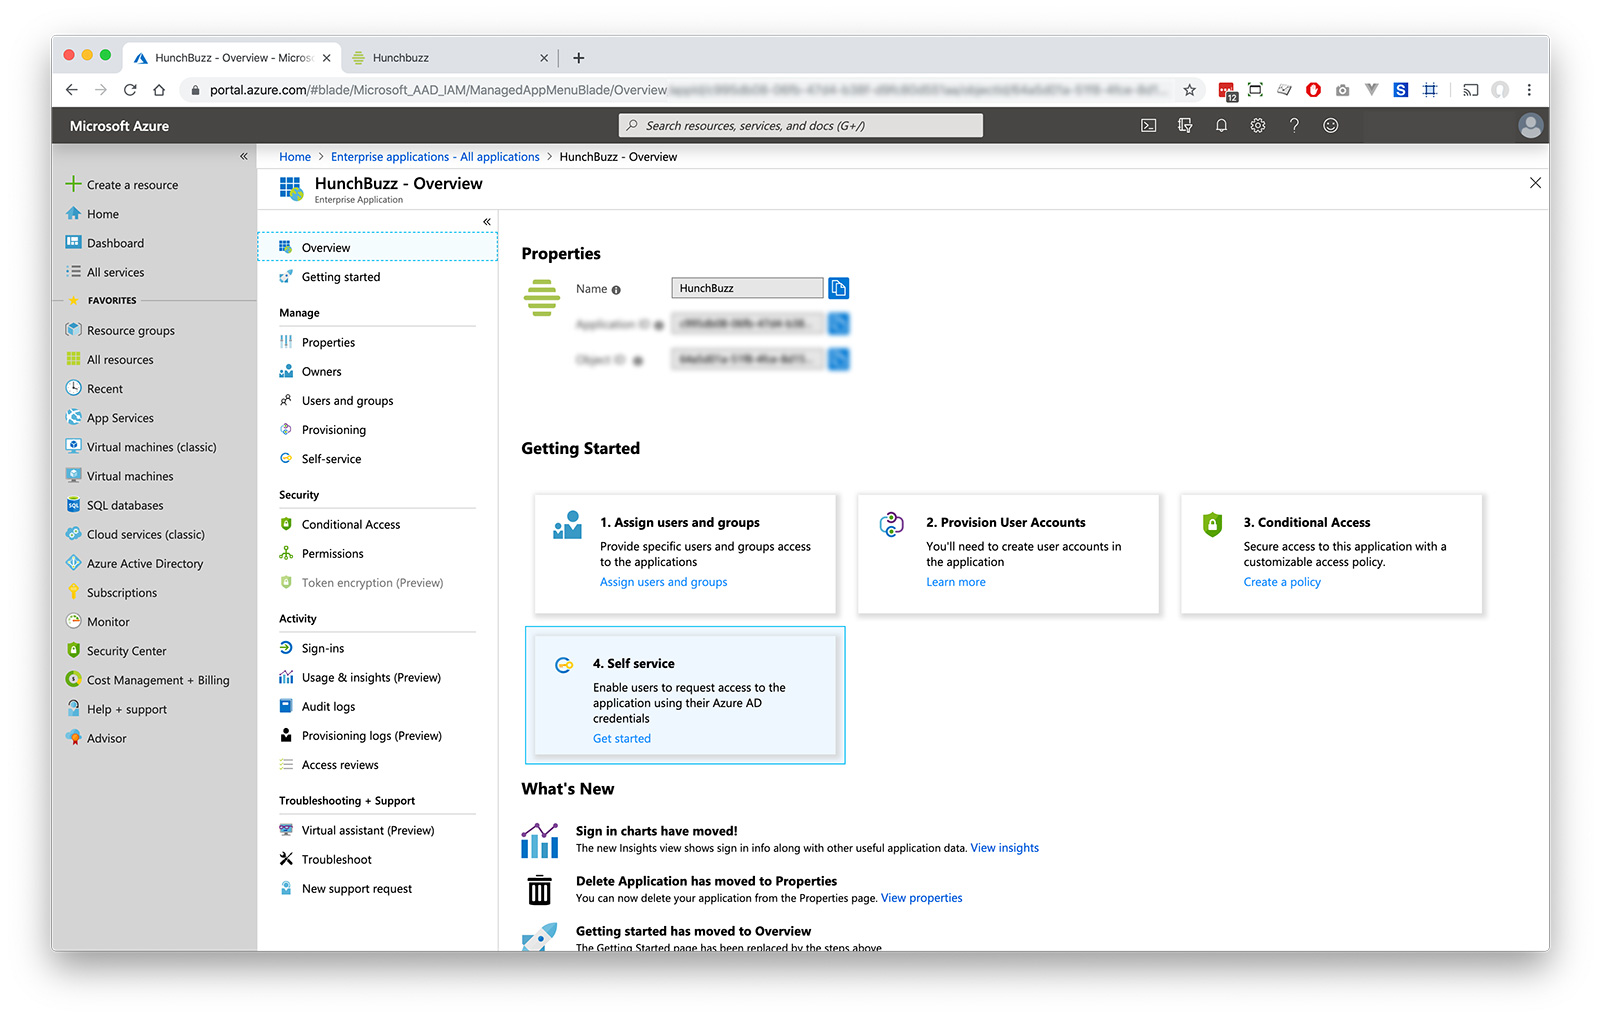
-
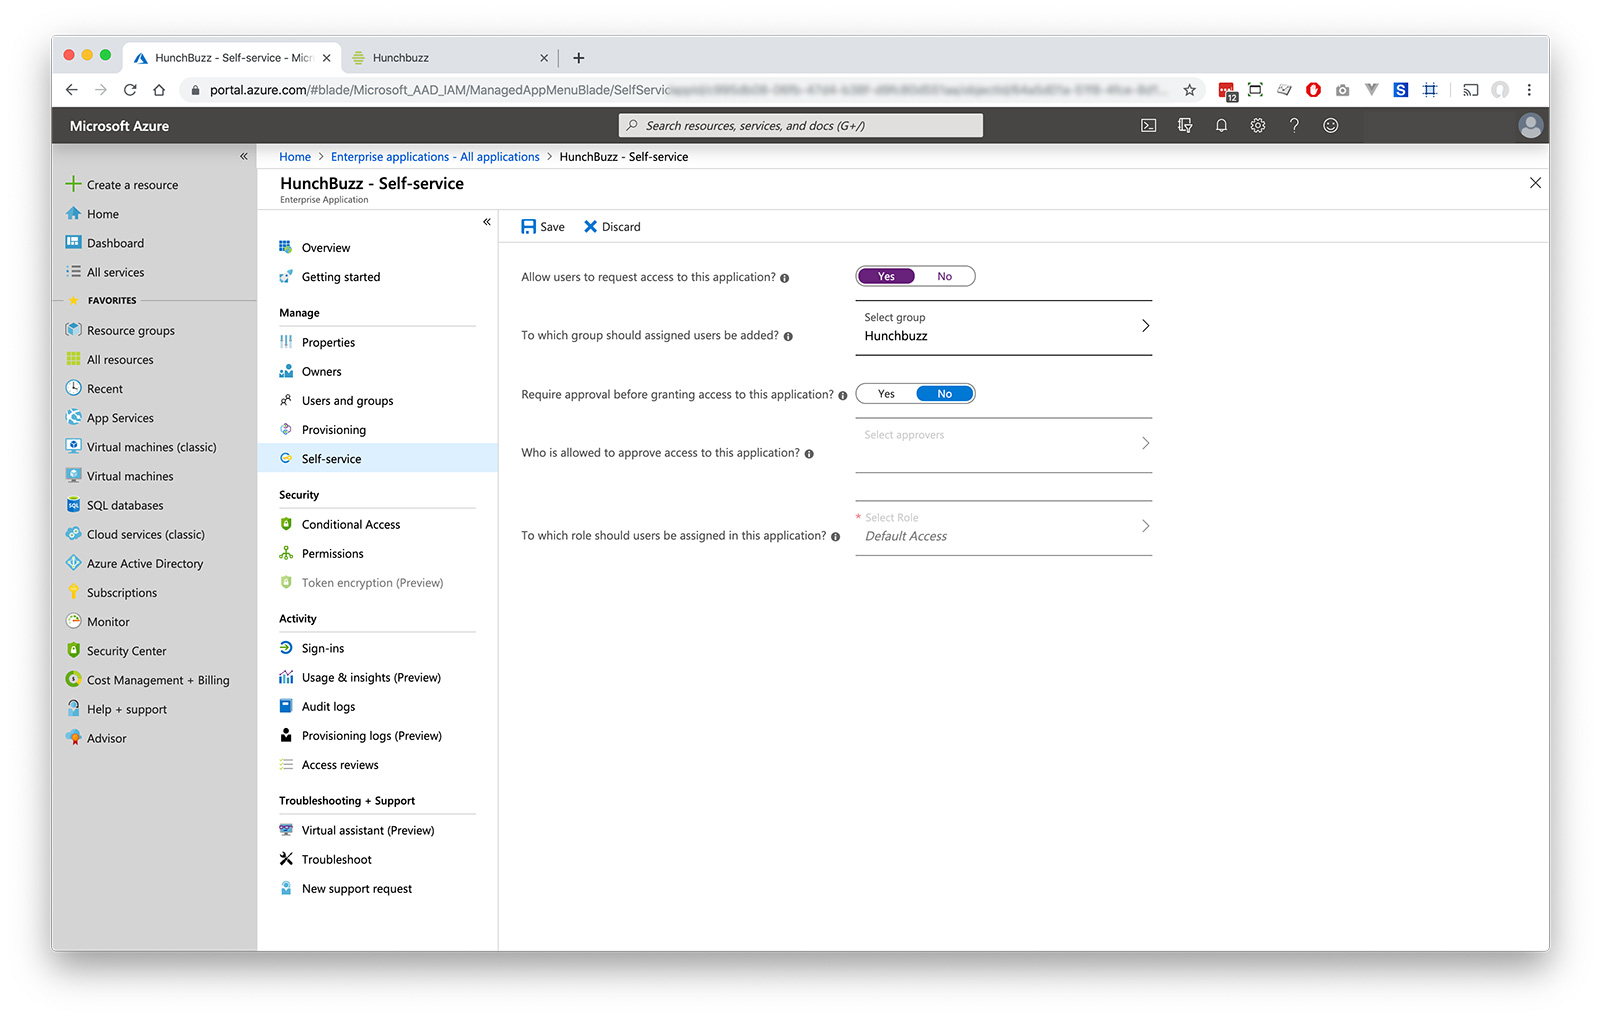
Set 'Allow users to requset access...' to "yes", choose a group for the users (you may need to create one first) and press save
-
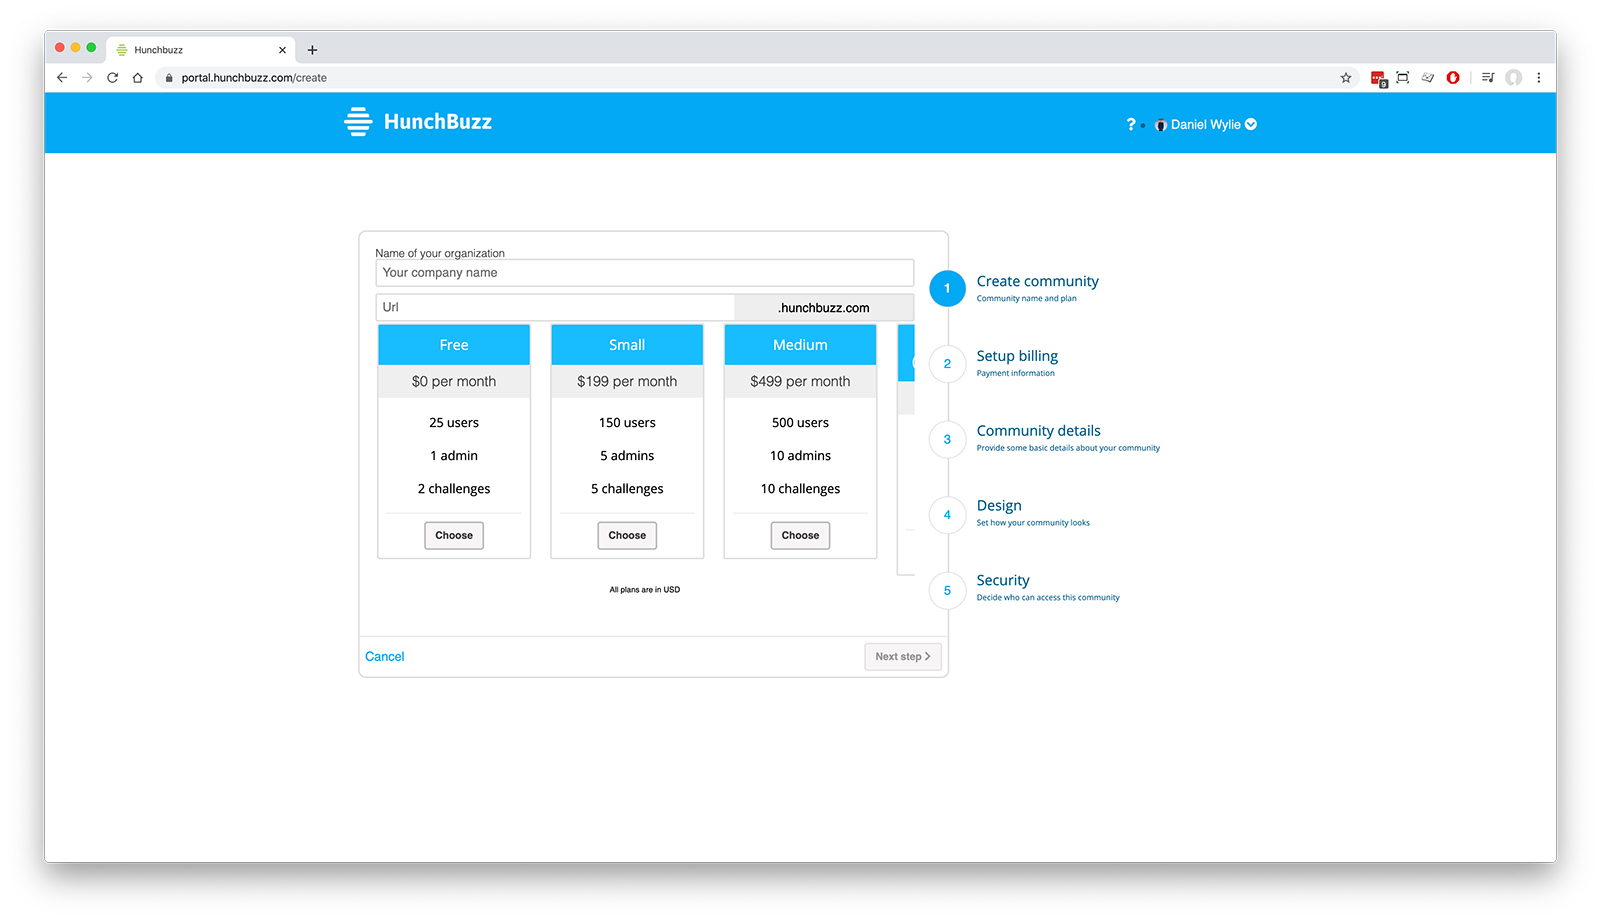
Once back in the Hunchbuzz Portal, create a new platform
-
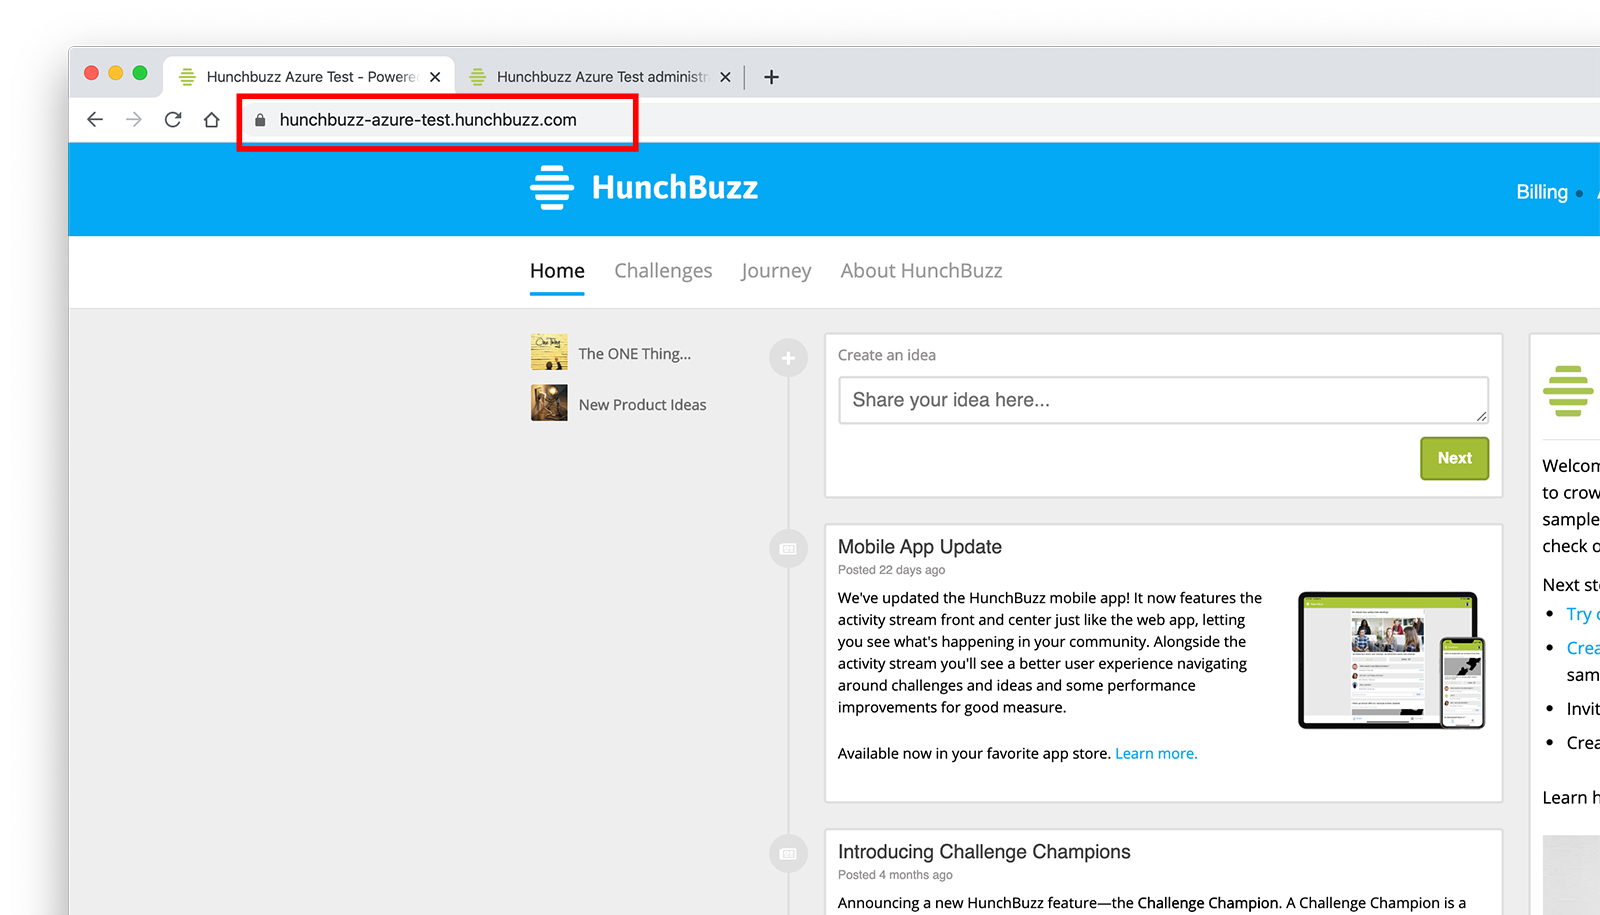
Once you have a platform, you can send your users to the URL - they'll be logged in via their Azure AD account. All new users need to come through your platform URL.
-
Optional If you want to add administrator users to your platform, you can create a group called 'HunchbuzzAdmin' in your Azure AD and add users to it - they'll automatically be mapped as administrators.